Building a Stone Veneer Fireplace Wall With a Walnut Beam Mantel
The short version
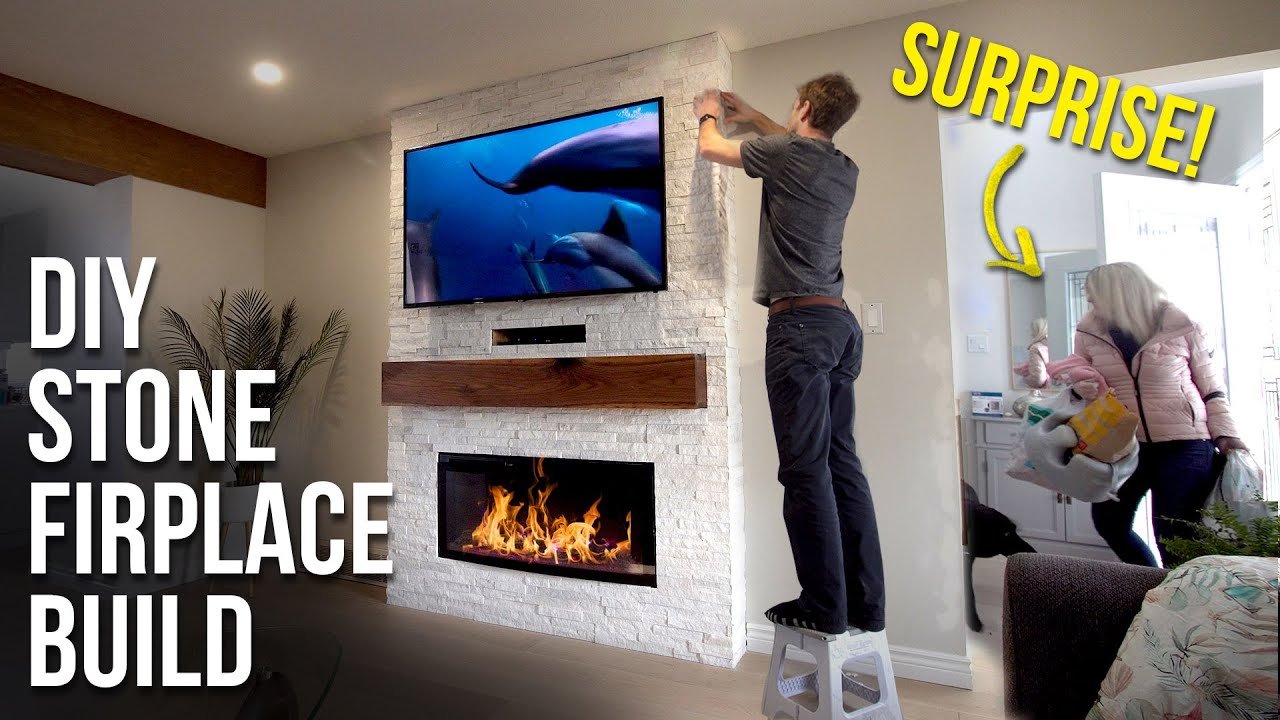
A builder frames a fireplace and TV wall for his mom's birthday. He adds LED pot lights, a TV mount, a walnut beam mantel finished with Rubio Monocoat, and stone veneer tiles cut on a tile saw. Gaps are filled with sanded ceramic caulk before the TV is installed and the wall is revealed.
Full written account
A stone veneer fireplace wall with a walnut mantel was built as a birthday present for the builder's mother. Her TV sat on an Ikea stand with a cable running across the floor, and he swapped his usual $20 gift for this build and revealed it on her birthday.
Framing and electrical
He laid cardboard floor protector, then used a multi-tool to remove the trim where the wall would go. With the breaker flipped off, he looked into the existing electrical, since he planned to add a couple of pot lights and reroute the wiring through the wall. He framed the wall in place rather than on the ground because he wasn't sure of the final design and wanted to visualize it as he went. By the end of the first afternoon the frame was about 75% complete and he could dry fit the fireplace.
The next morning he took out one existing receptacle and split the line. One run goes to a receptacle near the TV, the other to a switch and then the new pot lights. He notes the work differs for every project and doesn't go into detail. The thin LED pot lights click onto the wires, the box tucks into the ceiling, and the spring-loaded light pulls itself up into place.
Trim boxes and TV mount
Half-inch maple plywood formed trim boxes for the fireplace and the satellite box. A flush trim bit in a router cut the openings: its bearing rolls along the 2×4 framing, giving a flush cut without measuring before the OSB goes on. He installed the TV mount, checked it for level four or five times and test fit the actual TV.
The walnut beam
He planned cheap rough cut pine for the barn beam, but pine would have cost about $100 and walnut about $140, so he chose walnut. The pieces were cut at 45 degree angles, glued and clamped overnight. End caps and middle pieces for structural support went on the next day. A knot hole was closed off with silicone and filled with black two-part epoxy. For small flaws he sprays black CA glue with an activator, which can be sanded in 20 seconds.
The finish is Rubio Monocoat, wiped on with a white pad and wiped off as much as possible 5 minutes later. He sanded only up to 120 grit. Galvanized straps mount the beam to the wall.
Stone and the finish
He bought a tile saw from Canadian Tire for about $250, roughly double the price of a small tabletop unit, because he needed 45 degree cuts. It cut the stone tiles, which were mounted with beads of construction adhesive. A mistake on the tile day left a couple of dings to repair after the reveal; he also had COVID and took a week off. Gaps were filled with sanded ceramic caulk pushed in by finger and wiped with a damp paper towel, an hour or two of work. Then the TV went in and the wall was wrapped for the reveal.
Questions this video answers
Why did he use walnut for the beam?
Rough cut pine would have cost about $100 and walnut about $140, so he chose walnut.
How did he cut the openings in the plywood?
He used a flush trim bit in a router. Its bearing rolls along the 2×4 framing for a flush cut.
What finish went on the beam?
Rubio Monocoat, wiped on with a white pad and wiped off after 5 minutes. He sanded only up to 120 grit.
How were the tiles attached and cut?
Cut on a tile saw at 45 degrees and mounted with beads of construction adhesive.
How were the gaps between tiles filled?
With sanded ceramic caulk pressed in by finger, with the excess wiped off with a damp paper towel.
Explore related projects
Connected by the topic: Carpentry

