How to Build a Paver Walkway, Raised Beds and Pergola Daybed
The short version
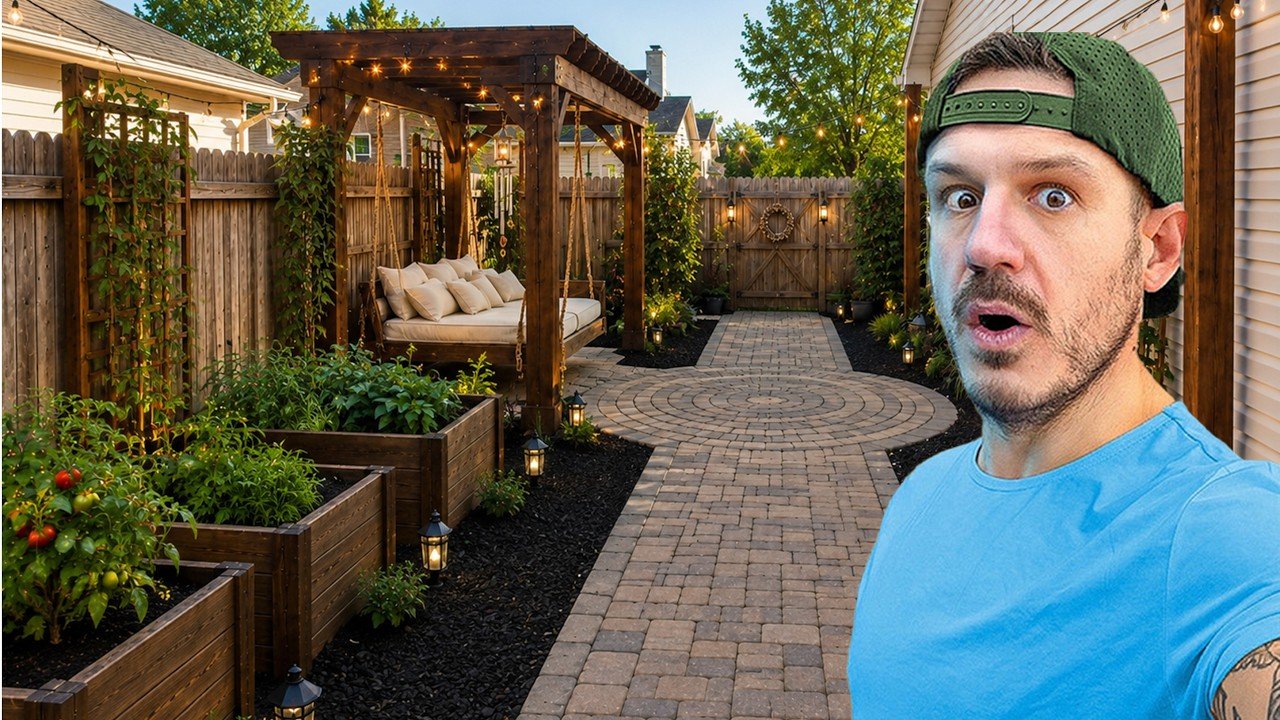
Mr. Build It turns a viewer's bare side yard into a garden in two weeks: a 48 in. flagstone-herringbone paver walkway with a round pad, tiered raised beds and a pergola with a hanging daybed. The useful part is the paver base: 5 to 6 in. of compacted road mix, screeded sand and polymeric sand in the joints. He hit irrigation lines while digging, so call for utility locates before you start.
Full written account
Most side yards are where the trailer and the trash cans live. Mr. Build It spends two weeks at a viewer’s house turning one into a garden: a paver walkway that ends in a round pad, tiered raised beds, light posts and a pergola with a hanging daybed. It’s a 52-minute build with plenty of banter, two sponsor segments (about 25:00 to 27:00 and 36:00 to 36:40) and some real lessons about paver bases.
Before you dig: call for locates
This is the most important step, and the video skips it. During the dig he ruptures a 1 in. sprinkler line, breaks a sprinkler box and finds layers of pipe he can’t identify. Irrigation is cheap to fix. A gas line, a buried power cable or a water service is not.
- US: call 811 a few business days before any digging. It’s free, and the national 811 site says every digging project needs it, regardless of depth.
- Canada: request a locate through your province’s one-call centre via Click Before You Dig.
- Locates mark public utilities. Private lines like sprinklers, landscape lighting or a line to a shed usually aren’t marked, so dig carefully by hand near anything you know about.
At a glance
- Skill level: Advanced, mainly because of the machine work, the volume of material and the pergola.
- Time: 2 weeks for the whole yard. Working out the paver pattern alone took him 8 hours.
- Cost: Not given in the video.
- Tools: Mini skid steer (rented), plate compactor (rented), shovels, screed pipe and a straight board, level, chalk line, string and a marker, angle grinder with concrete cutting blades (he tests 5 in. and 7 in.), leaf blower and broom, post-hole auger.
- Materials: About 4 to 6 yd of road mix, 3/4 in. PVC pipe (as screed rails), bedding sand, 305 sq ft of pavers in three sizes, polymeric sand, weed fabric, modular concrete raised-bed blocks with 2×6 boards, semi-transparent deck stain, 4×6 posts, drain rock, concrete, an end-grain sealer for the buried post ends, 2x4s and 2x2s for the daybed frame, chain, black mulch.
The paver walkway, step by step
- Excavate to a blank canvas. He clears the yard with a mini skid steer that barely fits through the gate (about 6 in. of clearance). Take your time along the fence line. He works slowly to keep soil and debris off the neighbour’s fence.
- Repair what you hit. He trenches the broken 1 in. irrigation line deeper and repairs it with poly pipe, couplings and pipe clamps, then caps an unknown line to deal with later.
- Lay 5 to 6 in. of road mix. Road mix (the base used under paved roads) is the foundation for your pavers. It spreads the weight, drains water and keeps the pavers from sinking years later. Grade it so water drains away from the house, then compact it with a plate compactor.
- Screed a sand bed. Set 3/4 in. PVC pipes on the base as rails, spread sand and drag a straight board across the pipes for a flat, level bed. He says galvanized steel pipe works better because it doesn’t flex, but costs more. He doesn’t recommend setting pavers straight on road mix: one stone a little high throws off the whole level.
- Spread the sand wider than the path. His walkway is 48 in., but the pattern pieces reach out to 50 or 55 in. before they’re trimmed. If the sand stops at 48 in., the edge pieces tip.
- Lay the pattern. The paver set is 305 sq ft in three sizes, ordered in the proportions the pattern calls for: 37% large, 37% rectangular and 25% square. He avoids straight linear patterns because long lines show every bit of movement. Once he worked out the sequence it was simple: big piece, then up, then to the side, and repeat.
- Cut the edges. Snap chalk lines for the edges and draw the circle by tying a marker to a string held at the centre. He cut with a cordless angle grinder and concrete blades. The 7 in. blade cut through, and a battery lasted him about 7 ft of cut.
- Extend the pad if you need to. The yard slopes two ways, and one quarter of the circle came up short. He built a small retaining edge from paver offcuts, filled and compacted it, and extended the pad by a foot.
- Fill the joints with polymeric sand. It works like grout and keeps weeds and insects out. Follow the bag: sweep it in, blow the excess off the surface, then wet it so it hardens.
Safety when cutting pavers
Cutting concrete pavers makes respirable crystalline silica dust, which OSHA links to silicosis, lung cancer and kidney disease. He mentions “breathing a bunch of dust” even while wearing PPE. Wear a properly fitted respirator, eye and hearing protection, keep other people away, and cut wet or with dust collection where you can.
Raised beds and the pergola
- Raised beds: He uses a modular system of concrete blocks that hold 2×6 boards, stacked into tiers without screws. Stained boards will still rot eventually, but each one slides out and can be replaced.
- Pergola posts: He digs the post holes with an auger (slowed by volcanic rock), adds drain rock and sets 4×6 posts in concrete, checking for plumb. He explains the usual options are pressure-treated posts or post bases on concrete footings, and chooses neither. Instead he coats the buried part and the end grain with a brown oil-based wax sealer.
Our caution on the pergola: untreated posts set straight into concrete will rot sooner than treated posts or posts on metal bases, and this pergola carries a swinging daybed. The video gives no footing depth, chain rating or hardware rating. For a structure that holds people, use posts and hardware rated for the load, follow your local frost-depth and footing rules, and check whether your city wants a permit (see our permit guide).
Common mistakes
- Digging without a locate request.
- Skipping the sand bed and laying pavers straight on the base.
- Spreading sand only to the finished width.
- Long straight joint lines that show movement.
When to call a pro
Call a landscaper with a compactor and saw if the yard has serious slope or drainage problems. Call the utility right away if you hit anything other than your own irrigation line.
Related
Questions this video answers
How long did the side yard project take?
The video says the project was finished in 2 weeks.
What base goes under the pavers?
Road mix, 5 to 6 in. deep, as a compact base that distributes weight, keeps water draining and stabilizes the pavers; then 3/4 in. PVC pipe, sand, screeding, pavers and polymeric sand.
What paver pattern was used?
The paver set was 305 sq ft in three sizes: 37% mega, 37% rectangular and 25% square, laid as a flagstone herringbone pattern.
What is polymeric sand for?
Polymeric sand works like a grout: it prevents weeds and insects, and is pushed in, brushed, blown off and wetted so it hardens.
What was built in the yard?
Yes. The side yard has a paver walkway, a circular pad, tiered raised garden beds, a pergola with a daybed swing hung on chain, and posts for lights.
Explore related projects
Connected by the topic: Carpentry

