Basement Stairs Makeover With Oak Plywood Treads for Under $200
The short version
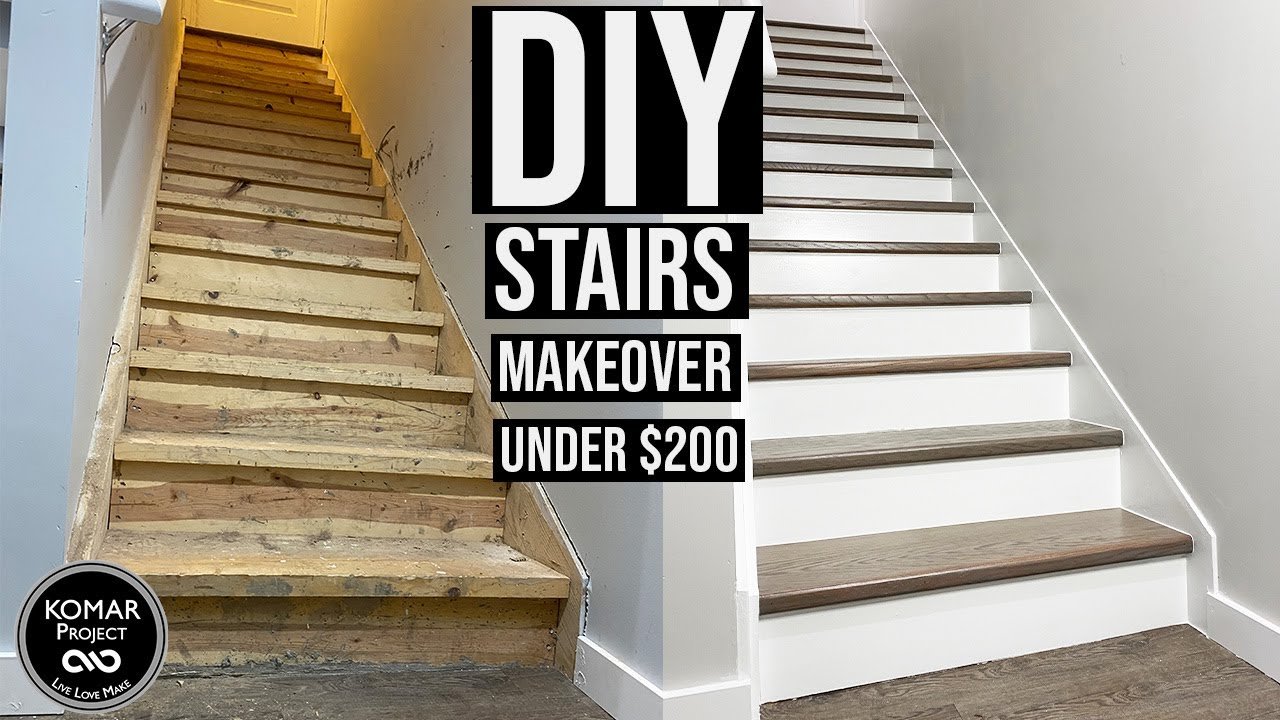
The creator turns unfinished basement stairs into finished ones for under $200 over 3 days. He adds oak plywood treads, routed solid oak bullnose strips and hardboard risers, then sands, primes, stains, applies polyurethane and caulks. He states the cost works out to just over $13 per step for 13 steps, compared with $40 to $50 for traditional oak treads.
Full written account
Under quarantine, with finances strained, one DIYer set out to finish the unfinished stairs down to his basement for under $200. The project took 3 days, and he says it works out to just over $13 per step across 13 steps, against the $40 to $50 range he cites for traditional oak treads.
The approach
He names the parts first: the sides are stringers, the part you step on is the tread, and the rising part is the riser. The cost-saving idea is solid oak strips for the bullnose and quarter-inch oak plywood for the treads.
Preparing the stairs
He first added a 1 in. piece of trim to the top of the stringer to break the connection between the drywall and the stairs. He spackled nail holes and wood knots on the stringers only, since treads and risers would be covered, then sanded with a random orbit sander and 120 grit. The stringers are the only original part that gets painted, so imperfections there would show through. He also removed glue left from the original construction.
He then marked 3/4 in. in from the front of each step and cut it off, using a circular saw freehand and a jigsaw plus a hand saw to finish. He says the circular saw and hand saw are enough. The stringers were primed so the wood would not soak up paint.
Treads and bullnose
The oak plywood was ripped on a table saw and cut to size using the cut-off piece from the front of each step as a guide. The treads were fixed with liquid nails and a brad nailer; he later switched to a pin nailer, which nearly eliminated nail holes. He found that letting the plywood extend past the step by about a sixteenth gave a tighter fit and virtually no gap against the solid oak piece.
His mistake: he ripped the oak to 1.5 in., the thickness of the original stairs, forgetting the quarter inch of plywood just added. A quarter inch of the stair shows under the bullnose, which he painted to match the riser. The strips were routed on both sides with a 3/4 in. roundover bit, sanded with 120 grit, glued and pin nailed. He wanted the oak slightly higher than the plywood so he could sand it without risking sanding through the veneer.
Finish
The stain, early American, came out too brown and did not match the existing flooring, so he added coats of beige to bring out gray tones, settling after about three coats. Instead of the traditional three coats of polyurethane, he used one coat of Minwax one-coat poly with a natural bristle brush on the tops and fronts of the treads. He says he could not tell the difference, though time will tell.
Risers and caulk
Hardboard was ripped to width and crosscut, sanded by hand with 120 grit to sharpen edges, primed, then glued and pin or brad nailed in place. Acrylic caulk went on before painting.
Questions this video answers
How much did the stair makeover cost?
Just under $200, which he says is just over $13 per step for 13 steps.
How long did it take?
The description says the project took 3 days.
What were the treads and bullnose made of?
Quarter-inch oak plywood for the treads and solid oak strips for the bullnose.
What mistake did he make?
He ripped the oak bullnose to 1.5 in., forgetting the added quarter inch of plywood, so a quarter inch of the original stair shows under the bullnose.
Did he use three coats of polyurethane?
No. He used one coat of Minwax one-coat poly and said he could not tell the difference from three coats, though time will tell.
Explore related projects
Connected by the topic: Carpentry

