DIY Walk-In Closet Shelves From 3/4 in. MDF, Nailed to Studs
The short version
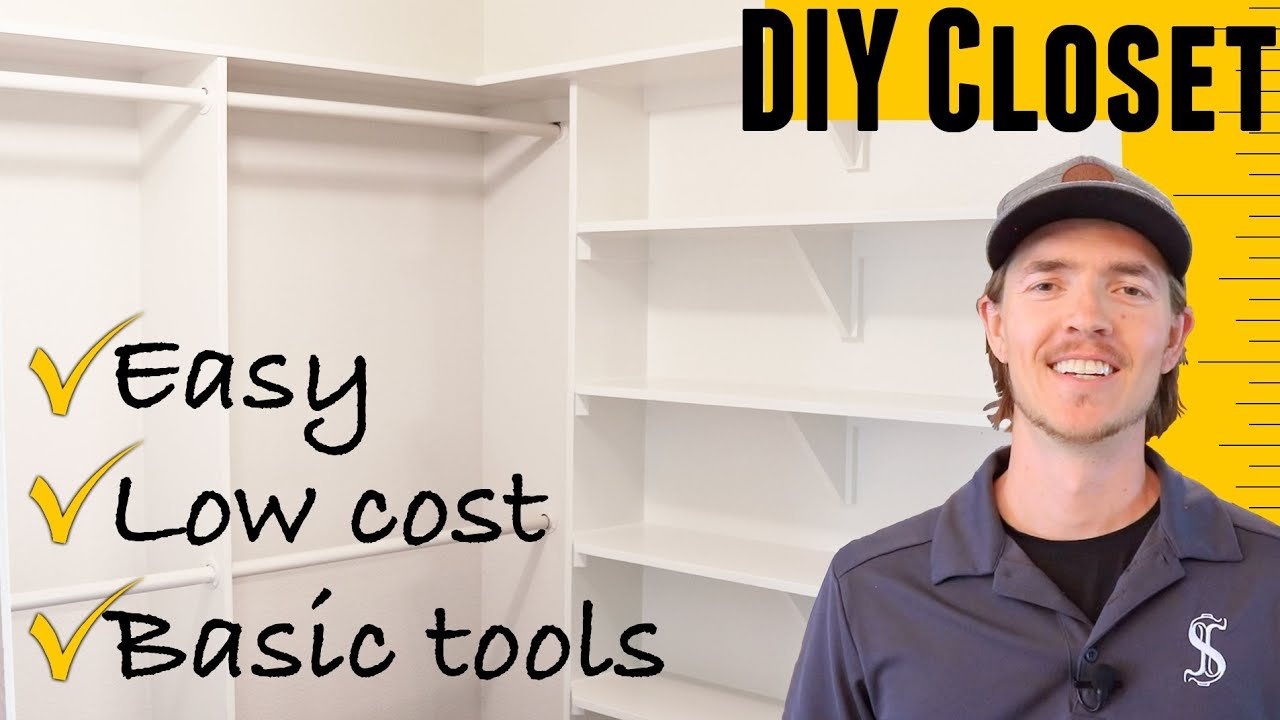
Shows how to build a DIY walk-in closet from 3/4 in. MDF shelves with MDF strip supports instead of brackets. Covers cutting, priming and painting the pieces, prepping the closet, nailing the supports into studs, caulking and hanging closet rods. Ends with tips for measuring, diagramming and making a cut list. The creator did the project over five days working a couple of hours a day and says full days could have finished it in about two.
Full written account
A walk-in closet can be fitted with custom shelving from a single material: 3/4 in. MDF, which comes in 4×8 ft sheets at $30-$40 per sheet. The approach replaces store-bought closet systems with cut, painted and nailed-up shelves, and the creator calls it "simple, yet effective."
Cutting the shelves and supports
A table saw is ideal for cutting MDF, but a circular saw works with a straight piece of wood clamped down as a guide. The shelves here are 12 in. wide, though width is up to the builder. Strips of MDF at least 2 in. wide serve as shelf supports, which avoids shelf brackets that often get in the way. A miter saw cuts the supports to length. For shelves longer than three feet, the video suggests triangular MDF supports or bought brackets. Corners can be softened with 180 or 220 grit sandpaper.
Painting
Painting is done with a roller before installation, one side at a time, which means fewer fumes inside the home. Painting after installing with a sprayer would be faster. The best finish comes from one coat of oil-based primer and two coats of paint, though the creator doesn't think the second coat is necessary in a closet. Water-based primer makes the water raise the MDF wood fibers and roughen the surface, so the shelves need sanding first. The creator used water-based primer and sanded only the shelf tops.
Prepping and installing
Prep in this closet meant removing old shelves, patching many holes and painting the walls in the shelf color. For installation, a level marks shelf lines on the wall, a stud finder locates the studs, and a vertical line marks each stud center. A brad nailer drives 2 in. nails through the supports, three per stud location. Without one, a 2 in. screw per stud location works, only slower. Some cuts are expected during installation. Vertical boards divide sections so they don't rest on the carpet, which required cutting the carpet and baseboards.
The project took five days at a couple of hours a day. Working full days efficiently, the creator estimates about two days. Planning is the most time-consuming stage.
Finishing
Shelves are tacked in place with a few nails. Optionally, caulk the edges and paint over the caulk and nail or screw heads. Closet rods from a home store are cut to length and hung.
Planning the design
Measure the width and height of each wall, note irregular features, and sketch diagrams. Decide how much hanging rack space is needed, identify large items such as a laundry basket or shoe rack, then fill remaining space with shelving. This closet uses 12 in. deep shelves spaced 12 in. apart, with rods 44 in. off the ground and 36 in. apart. A cut list of each piece's dimensions comes last.
Questions this video answers
What material are the shelves made from?
3/4 in. MDF, sold in 4×8 ft sheets at $30-$40 per sheet as the video states.
Do you need shelf brackets?
No. MDF strips at least 2 in. wide nailed to the wall studs serve as supports. For shelves longer than three feet, the video suggests triangular MDF supports or store-bought brackets.
Should you use oil-based or water-based primer?
Oil-based primer gives a smoother surface. Water-based primer raises the MDF wood fibers, so the shelves need sanding first. The creator used water-based and sanded the shelf tops.
How are the supports attached?
With a brad nailer and 2 in. nails, three nails per stud location, or one 2 in. screw per stud location.
How long does it take?
The creator spent five days at a couple of hours a day, and says about two full days is possible if working efficiently.
What shelf and rod dimensions were used?
12 in. deep shelves spaced 12 in. apart vertically, with rods 44 in. off the ground and 36 in. apart.
Explore related projects
Connected by the topic: Build built-in bookshelves