DIY Shiplap Built-Ins With Floating Shelves Beside a Fireplace
The short version
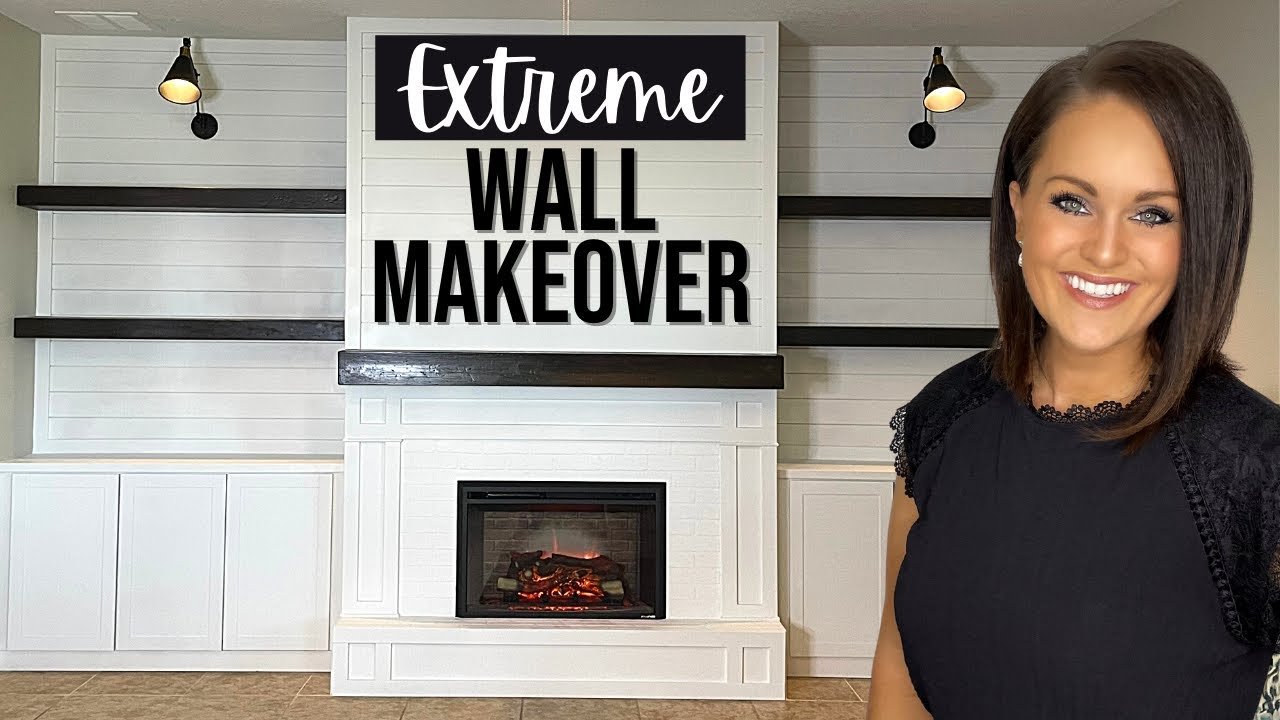
The creator builds shiplap built-in side cabinets and floating stained shelves on both sides of a fireplace she had previously built. Stock upper cabinets are set on a 2×4 base frame, covered with shiplap, topped with plywood and painted, and plug-in light fixtures are made to look hardwired by dropping the cords behind the shiplap. She says the work saved thousands of dollars and needed no electrician.
Full written account
A fireplace she had built from the ground up a couple of months earlier became the center of a living room wall makeover: shiplap built-in cabinets and floating shelves on both sides, made from stock cabinetry. She says doing it herself saved thousands of dollars and that no electrician was needed.
Starting point and plan
Before the cabinets could go in, the floor tile had to be reinstalled. She had ripped out all of the tile when building the fireplace, and she laid it before the cabinetry so it would be there if the cabinets were ever switched out.
The cabinets are stock upper cabinets bought from a home improvement store and converted into lowers. Real lower cabinets would have come out almost flush with the fireplace, and she wanted a staggered look. That required lifting them off the floor and adding a topper. Part of the existing trim molding was removed with an oscillating tool where the base would sit.
Base frame and prep
The base frame is regular 2×4 lumber, 15 inches deep and 59 1/8 inches wide, assembled with a framing nailer. She wore eye protection and notes the gun is loud; a drill and screws are an alternative. A support beam sits under each cabinet seam.
For the shiplap, 1x2s were nailed vertically into marked studs to disguise where the light cord would drop. A crossbar on the back adds support and a ledge for the countertop, and another piece sits behind the filler pieces as a brace.
Cabinets and outlet
She did not want to deal with electrical work, so she left the outlet where it was and framed a box around it, cutting the hole in the cabinet with a drill and jigsaw. Cabinets were clamped together, pre-drilled in the face frame and joined with cabinet screws, checked for level and screwed to the back frame. Filler strips were cut with a jigsaw with painter's tape protecting them. Minor gaps were left to be caulked.
Shiplap and countertop
Her sister-in-law Anna helped cut shiplap, using the first cut piece as a pattern to mark the rest. Installation started at the top, lined up with the fireplace. A 2 1/2 inch hole saw hole was drilled for each light cord. The countertop is a 1×2 frame nailed on shimmed cabinets, topped with 16 inch deep plywood and finished with 1×2 trim on the edge.
Floating shelves
Each shelf is a 1×4 pine shell built over a 2×2 frame with at least five brackets, glued and finish-nailed. Because of a roughly one inch gap, she added blocks inside as braces, since her boys might climb. The shelves were beaten with tools and sanded to round corners for an old-beam look, then fitted over brackets nailed into studs. 1×3 flat trim hides unfinished edges.
Finish and lights
After spackle, caulk and priming, parts were sprayed in Sherwin-Williams Extra White semi-gloss. Shelves got Kona gel stain and polyurethane, and were nailed on with multiple finish nails per bracket. A gap between double doors was filled with a cut-down toe kick.
The plug-in fixtures were mounted on brackets and the cords fished down behind the shiplap with twine and a weighted needle. One cord was hard to pull through, and she had to cut a hole in the bathroom wall behind it to patch later. She recommends 2×3 rather than 1×2 for more room. A magnetic remote on the wall acts as a light switch.
Questions this video answers
Did she hire an electrician?
No. The light fixtures plug in and the cords are hidden behind the shiplap, and the existing outlet was left in place with a box framed around it.
How big is the hole for the light cord?
She drilled a 2 1/2 in. hole with a hole saw.
What would she do differently?
She recommends leaving more room behind the shiplap for the cord, using 2×3 instead of 1×2.
What cabinets were used?
Stock upper cabinets from a home improvement store, converted into lowers and lifted on a base frame.
What paint and stain were used?
Sherwin-Williams Extra White in semi-gloss, and Kona gel stain with polyurethane on the shelves.
Explore related projects
Connected by the topic: Build built-in bookshelves