Floating Shed Foundation With Camo Blocks and a 2×8 Deck Frame
The short version
A floating shed foundation is built from Camo blocks set on compacted limestone screenings, with a double 2×8 pressure-treated frame, joists at 16 inches on center and a half-inch pressure-treated plywood floor. The builder explains leveling, fastening and code considerations in Ottawa. He gives a material order of 1,800 for this delivery and an estimated 3500 total for the shed.
Full written account
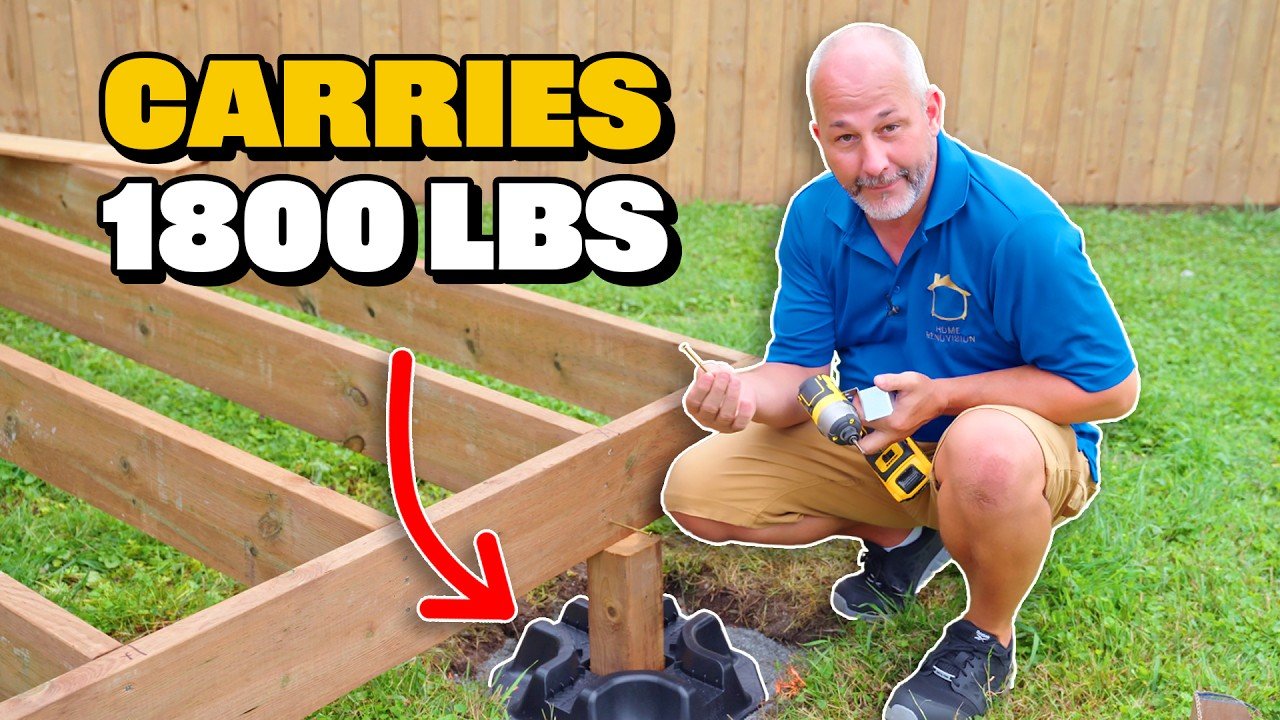
A 10 by 16 foot shed floor in Ottawa rests on just a handful of plastic blocks, each rated for 1,800 lb, while the whole finished shed is expected to weigh about 2,200 lb. That margin, more than double what the structure needs even with winter snow, is the idea behind the floating foundation built by Home RenoVision DIY in a 2023 video. The builder chose it because it is the easiest and cheapest option for DIYers, and treats the base like a deck strong enough to carry live load and snow load.
Camo blocks and the stone dust pad
The system uses Camo blocks, heavy-duty plastic units that take a 4×4 post (a 6×6 also fits if a design calls for it). Because the plastic separates the wood from the ground, it acts as a moisture barrier and stops moisture wicking up. The builder's reasoning is that a building not in contact with the ground can dry out between wet and dry seasons and last a long time. The blocks have drainage holes, and height is measured from the internal ribs the post sits on, not from the bottom.
The blocks are placed with a one foot overhang at each end and at the back. The builder marks the locations with paint, removes the lumber, and digs. All organics, grass and black dirt, must go, so the block sits roughly flush with the finished grass. The holes are then lined with about an inch to an inch and a half of limestone screenings (stone dust), levelled by foot and tamped. The builder says it packs well, bonds when wet like a concrete block and drains well. Unlike interlocking paver installs, where the base is set and not packed, the base here is packed first and the block set after. The builder admits the holes should have been dug larger and had to widen the back side by a couple of inches.
Cutting to stay inside code
The frame is 2×8 pressure-treated lumber with two-piece ridge beams of two boards (1½ in. each) at each end, so the joists are cut to fit inside a 10 ft total span. That means cutting them to 96 in. The builder warns that framing with 2×10 stock would make the building a few inches longer than allowed, and a neighbour complaint can bring a code officer with a tape measure to a shed that is 10 ft 1 in.
Lumber varies in length, so boards are flushed together at one end and every cut is measured from that end. A marker line on the saw table shows where the blade falls. Thirteen joists are cut this way, and every cut end is sealed generously with wood preservative, which the builder says is not as good as pressure treatment but is treated.
Framing, leveling and fastening
Joists go on 16 in. centres, with both rim joists marked from the same end so the joists do not end up on an angle. The code rule quoted is one nail for every 2 in. of dimensional lumber: four nails on a 2×8, or three nails plus a structural screw. The builder uses three nails plus a GRK structural screw as the fourth fastener, driven about 2½ in. into the joist, and adds joist hangers with one screw on each side for longevity. He calls it overkill and says the structure is the one place he does that. The joists are installed crown up, since weight flattens a rainbow curve but worsens a bowl. A badly crowned joist is pulled straight with a screw at 45° across a half-inch gap.
Without a laser level, he pegs the corners with temporary screws, each holding about 80 lb, and sets the frame slightly high because the weight will make it sink. Stabilization blocks screwed into the 4×4 posts remove the wobble. Two 2x8s nailed together every 16 in. with four nails, he says, triples the strength of the beam rather than doubling it. Load travels from the beam to the point-load location, down the 4×4 and to the ground. The same frame could be tied into concrete-set posts by brackets where code requires fasteners, with concrete poured last.
Floor and cost
The floor is ½ in. pressure-treated plywood in 4×8 sheets, fixed with 1¼ in. roofing nails or screws, and chosen so weeds such as the wild parsnip in his ditch cannot grow through. Sheets start flush at the back, and the joints are staggered. Nailing starts at one side and works across, since sheets have a hump. A saw set to 5/8 in. depth instead of 3½ in. helped the battery saw keep up on a late trim cut.
The material order for the delivery was $1,800, with wall and roof lumber still to come. The builder estimates about $3,500 for the 10 by 16 building, against $20,000 for a nicer shed. He advises checking with the local building office, since code varies, and says everything shown is legal unless you live in Ontario.
Questions this video answers
How much weight can each Camo block carry?
Each Camo block is rated for 1,800 lb, which he says is more than double the strength needed for the roughly 2,200 lb shed.
What goes under the blocks?
Limestone screenings (stone dust), about an inch to an inch and a half deep, tamped flat. Organics like grass and black dirt are removed first.
How are the joists spaced and cut?
Joists go every 16 inches on center, cut to 96 inches so the 10 ft outside dimension does not exceed what code allows.
What is used for the shed floor?
Half-inch pressure-treated plywood, 4×8 sheets, fastened with a roofing nailer using 1 1/4 inch nails or with screws and an impact driver.
What does the shed cost?
He says he is looking at about 3500 for the 10×16 building; the material order for this delivery was 1,800.
Explore related projects
Connected by the topic: Build a shed

