Insulating a Shed Ceiling With Rigid Foam and Vented Rafter Bays
The short version
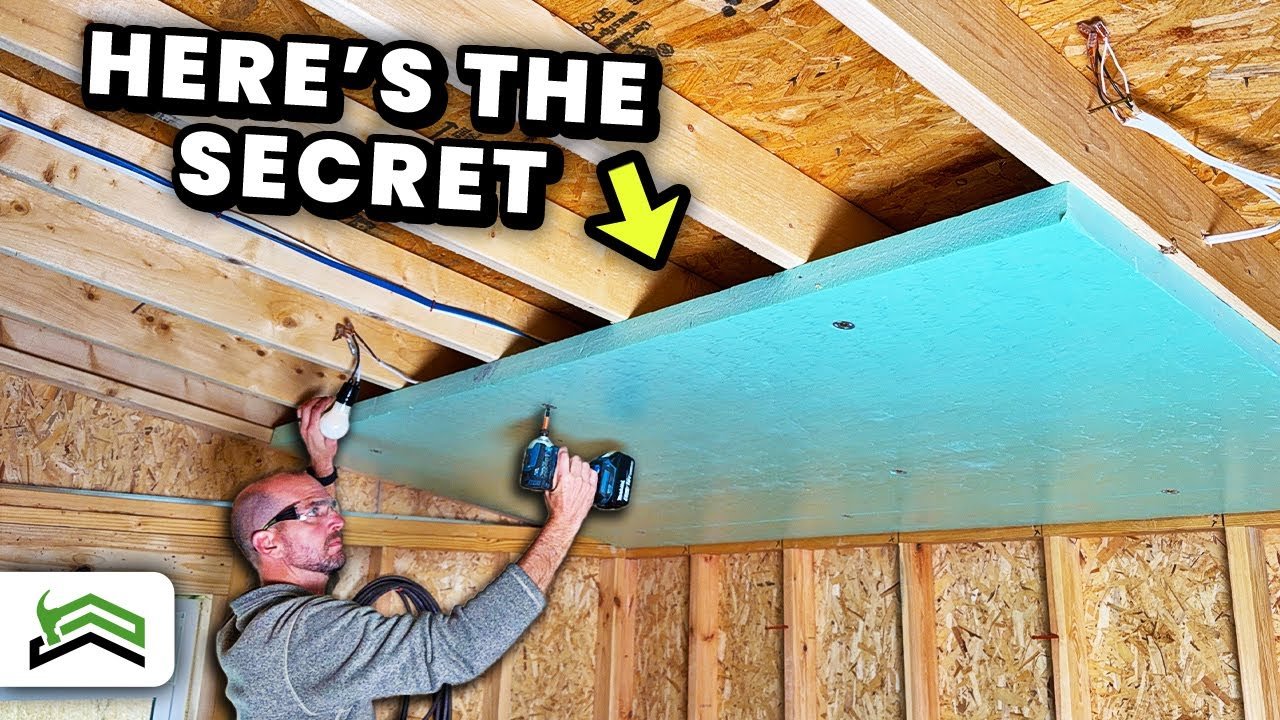
Scott of Everyday Home Repairs insulates the ceiling of a 12×16 shed being converted to an office using 2 in. rigid foam board fixed to the underside of the rafters. Airflow is kept open between the vented soffits through the rafter bays. Seams are filled with low-expansion foam and taped, and the video puts the cost at about $350 to $400.
Full written account
A 12×16 storage shed being converted into a backyard office gets a ceiling of 2 in. rigid foam board, six 4 ft by 8 ft sheets giving R-10, at roughly $350 to $400 including fasteners and seam tape. The method is built around one point: the rafter bays are not filled, so air can keep moving under the roof deck.
Choosing the insulation
In a poll of the channel's viewers, foam board was the most popular shed insulation at 31%, followed by Rockwool at 27%, fiberglass at 23% and spray foam at 18%. Foam board was chosen for ease of installation and a reasonable, if not cheap, cost. The shed is a 12×16 modern lean-to.
Cutting and hanging the panels
Two sheets span the width of the shed, with some trimming. A length of 93 in. is marked to land on a rafter, using a piece of LP trim as a straight edge. The board is scored with an Olfa knife whose blade extends more than 2 in., so it cuts straight through. A shorter blade can snap the board cleanly if the cut line sits on a solid surface such as a countertop.
One person can lift a panel, though a head or a long screw in the corner can help hold it up. Each panel is fastened with GRK 3-1/8 in. screws, which give over an inch of bite into the rafter after passing through the 2 in. panel, plus GoBoard washers. The pattern alternates two fasteners on one rafter, one on the next, then two again. The panels are not heavy, so heavy fastening is not needed. Screws are sunk slightly below the surface in case the ceiling will be finished. Any holes or locating work should be done before more panels cut off access.
Why the bays stay open
Filling the cavities with insulation without planning ventilation between the roof surface and the indoor space would create conditions for condensation and moisture, and over months or years for mold, especially with fiberglass. This is described as common in sheds, off-grid homes and cabins. Here the high side has a vented soffit and the low side is vented too, so air passes through each cavity between the 2×6 rafters. That is meant to reduce condensation and moisture that would damage the roof decking.
Sealing the seams
After the four remaining panels are up, window and door expansion foam fills the gaps. It does not expand much, and once dry it is cut flush. Sika seam tape then goes along each seam. It bonds strongly and can be torn by hand without scissors or a razor blade.
Questions this video answers
What is the number one mistake when insulating a shed roof?
Filling the rafter bays with insulation without thinking through ventilation between the roof surface and the indoor space. The video says this can lead to condensation, moisture and mold, especially with fiberglass.
What insulation does the video use?
Rigid foam board, 2 in. thick, in 4 ft by 8 ft sheets, fastened to the bottom of the rafters. Six sheets cover the 12×16 ceiling at R-10.
How much does it cost?
About $350 to $400, including fasteners and seam tape.
What fasteners hold the foam board?
GRK 3-1/8 in. screws with GoBoard washers, alternating two fasteners and one fastener on each rafter.
How are the seams sealed?
Window and door expansion foam fills the gaps between panels; once dry it is cut flush, and Sika seam tape is applied along each seam.
Explore related projects
Connected by the topic: Carpentry

