Plywood Built-In Closet Around IKEA Dressers for About $1,000
The short version
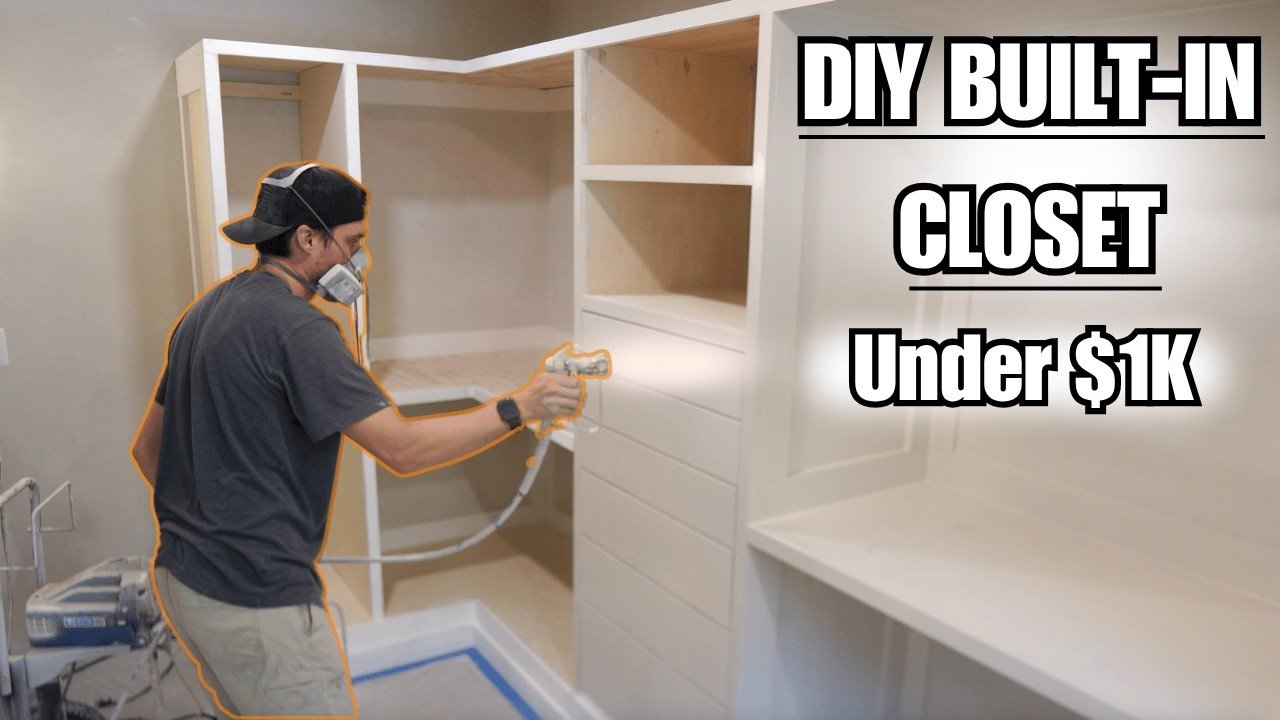
A homeowner builds a his-and-her built-in closet on a blank wall in a master bathroom, using a 2×6 base, 3/4 in. plywood boxes joined with pocket holes, IKEA dressers, and 2 in. primed pine trim. The video covers scribing plywood to the wall, trimming, painting with an airless sprayer, installing handles and adding pant organizers. The creator puts the all-in cost at about $1,000, versus about $2,000 for an IKEA system.
Full written account
A blank wall in a master bathroom became a his-and-her built-in closet spanning about 14 feet, built from plywood, IKEA dressers and pine trim for roughly $1,000, according to the builder. He says buying the same closet through the IKEA pack system would run about $2,000.
The base and the plywood caps
The build starts with a 6 in. base made of 2x6s, chosen to match the 6 in. trim in the closet; 2x4s would also work. He levels the base carefully, saying that if it is off, the error grows by the time the plywood goes on. The base is screwed to wall studs with 3 in. screws.
A sheet of 3/4 in. plywood is ripped down the middle into pieces about 24 in. wide to cap the base. Where the plywood did not sit flush against the wall, he scribed it: he found the biggest gap, about 1/4 in., set a pencil to that thickness, and traced the wall's curve onto the plywood before cutting it. Trim at 6 in. is butted to the plywood and nailed with 1 1/2 in. brad nails about every foot, with 45° corners. Construction screws lock the plywood down around the perimeter.
Boxes around the dressers
The IKEA dressers are set in place to check the layout. The closet is described as a bunch of boxes screwed together, each piece needing to be square and cut to size. Temporary supports hold the overhead plywood while he measures. Around 100 pocket hole screws attach the plywood panels to plywood backer boards at the back. Cuts are made with a circular saw along a chalk line.
His pocket hole jig kit cost around $40 and has lasted two years. A roughly $150 model with a built-in clamp was an option, but he says the cheaper kit does the job. For hanging clothes he allows around 40 in. of space, with nicer clothes on top and shoes and an organizer below.
Trim and drawer fronts
The front face is trimmed with 2 in. primed pine in 16 ft sticks to avoid splices. Some pieces needed notching around a cabinet lip, and a large gap was filled with scraps. Where the plywood was off, he used wood shims and glue to keep the trim flush.
For the six drawers, he ripped leftover pine to each width, coated it with BIN primer so knots would not show through, and attached it with Liquid Nails and brad nails. The handles pass through both layers of wood, so they hold the fronts.
Paint and finishing
He spent over two hours caulking, sanding with 120 grit and filling nail holes. A sprayer was chosen over rolling to avoid brush strokes. After 24 hours of drying, he used a handle jig to drill holes. Two pant organizers, about $50 each, took around 30 minutes to install; each has about 12 prongs.
Questions this video answers
How much does the closet cost to build?
The creator says about $1,000 all in, covering seven sheets of plywood, trim, paint, closet rods, pant racks, dressers and handles.
How does that compare to IKEA?
He says buying it all from IKEA using its pack system would be about $2,000.
How much hanging space is needed?
He says you need around 40 inches of space to hang clothes.
Why prime the pine with BIN primer?
Raw pine knots can show through the paint and give an aged look within a month or two.
How long did the pant organizers take to install?
Around 30 minutes for both.
Explore related projects
Connected by the topic: Build built-in bookshelves